Mossy Cup Brewing Blogs
Monday, July 21, 2003
Brew in Review
Well, both of my 5 gallon carboys are bubbling away this morning. The Fat Tire (the one that was the warmest and I was most worried about originally) is popping about once every second and has nice trub on top. The Full Suspension is about once every 10 seconds and is starting to get small amount of trub, but it is a lower SG beer, so maybe that is OK too. Both are at 73'F and the house is set for 70'F for the rest of the day, so should come down little more.
I think my main problem with missing the OG, was I got carried away with accounting for losses in my system in Promash. It is very flexible, and it lets you put in a lot of data, and I was trying to hit 12 gallons post brew on my water (after all the boil losses, cooling shrinkage, left in boil kettle and CFC) and then wanted full 12 gallons to put into 6 gallon primaries.
Well, in actuality, I never really lost anything in the HLT coils, because we prefilled them and the sparging pushed anything that might have been left into the boil kettle. Did the same with the CFC, and my dip tubes get all but about 1/8th of a gallon out of the kettles. Finally, I forgot I was running a starter, and was going to be adding about 1/4 gallon of starter to each carboy too.
So, I should have adjusted the recipie (grains, etc.) up to hit a final amount of 12 gallons rather than 10 if that is what I was going to run, and in all honesty, I really should have just stuck with hitting 10 gallons (which would be about 2.5 gallons less than I started with preboil). I think with all that considered, it would have come out just fine. I figured what the SG would have been with 17% less water added to the boil kettle, and it would have been dead on 1.052 SG out of the boil. So, for now, I'm going to leave my efficiency at 75% and adjust grains and water a little bit. I think I lost less than 15%/hour in the boil too.
Sunday, July 20, 2003
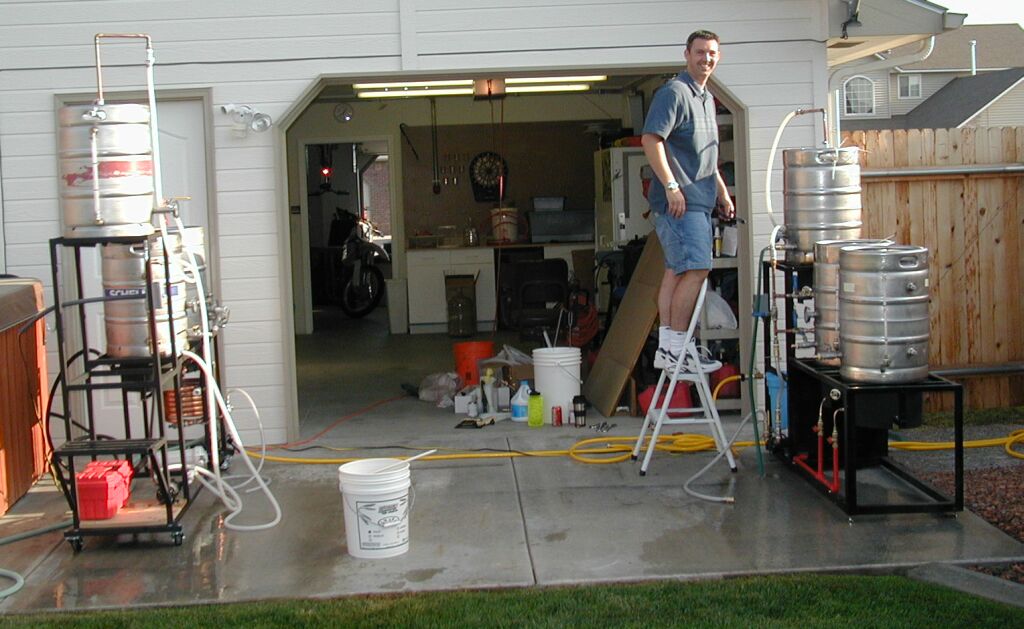
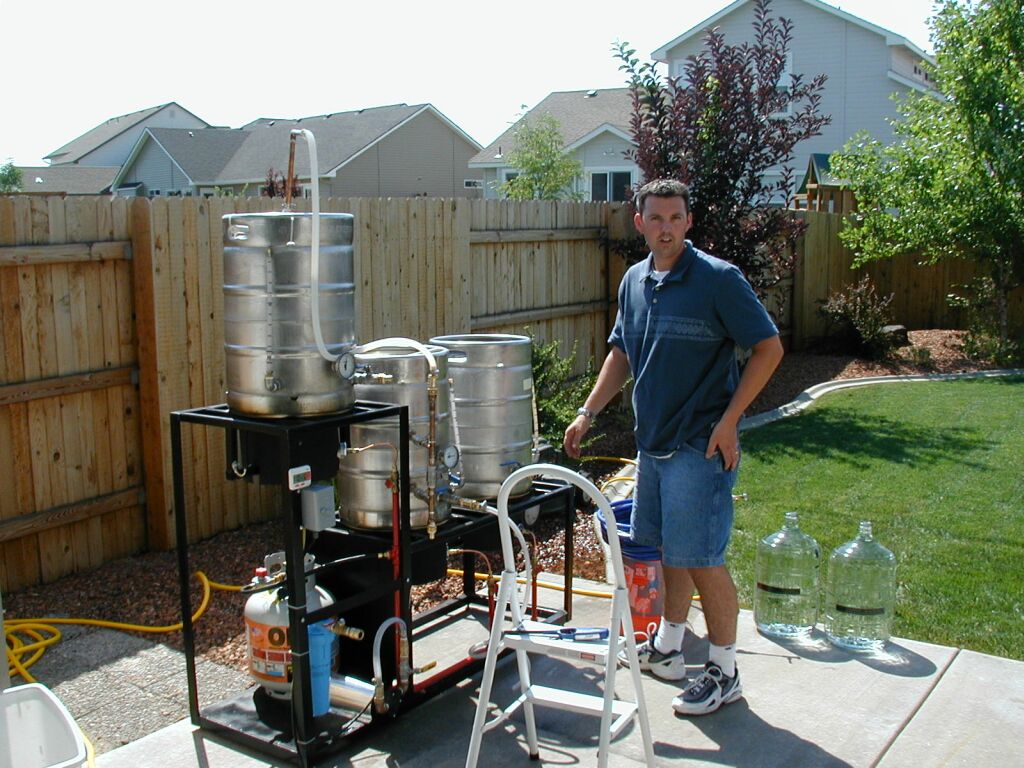
Pico Brew Day!!!
The fateful day of our FIRST brew on our frames has come and gone, and it was a resounding success! I have to thank Daryl Habersetzer for the brew day name...grin.

Hoody got here at 7AM (suppose to have been 6:30, heheh, but he was up until midnight finishing off his frame). The plan was to pop the cherry on both our virgin HERMS brew frames with two 10 gallon AG brews. He was doing a Squatters Full Suspension and me a Fat Tire American Amber clone. We planned to split the 10 gallons so we would each have 5 gallons to keg rack in two weeks.
Heheh, it could have been worse, that is for certain. We fumbled through it, and actually ended up with no major emergencies (though Hoody brought a small hardware store in supplies with him and was making up hoses and fittings right up until the end).
The biggest problem we had was priming our counter flow chillers. The aeration stone worked well once we got the beer out of the inline air filter that backflowed before we got it turned on.
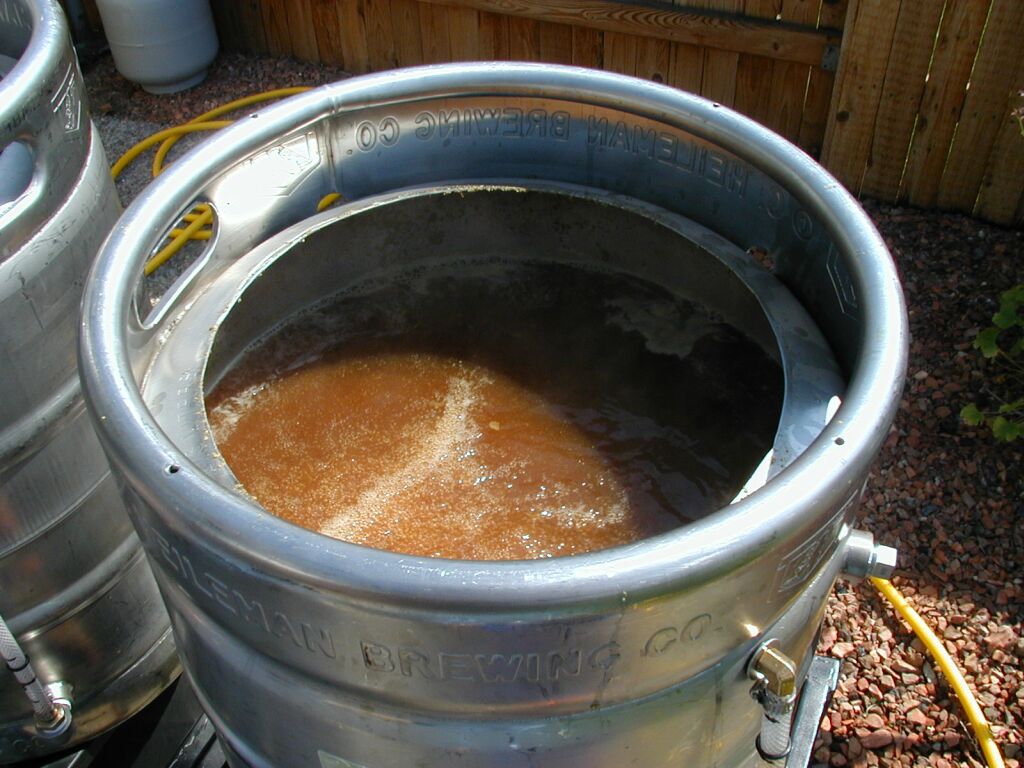
One thing that happened, is I missed my OG on the boil by quite a bit (needed 1.051, and only hit 1.033, and even supplementing 1.25 lbs of DME only brought it up to 1.038). Anyway, we'll see what happens.
When I finished with my batch, it was almost 100'F out and the sun was really hot. The wort only cooled down to about 80'F, and we were so busy, that I just pitched the yeast without checking it first. What happens if you pitch yeast into that hot of wort? It is in the house coming down to 72'F, but I'm a bit worried.
More later (need to decompile all the notes I took and everything else). I suspect our efficiencies are pretty low, considering I started with 18 lbs of grain and hit 14 gallons preboil with low SG.


Monday, July 14, 2003
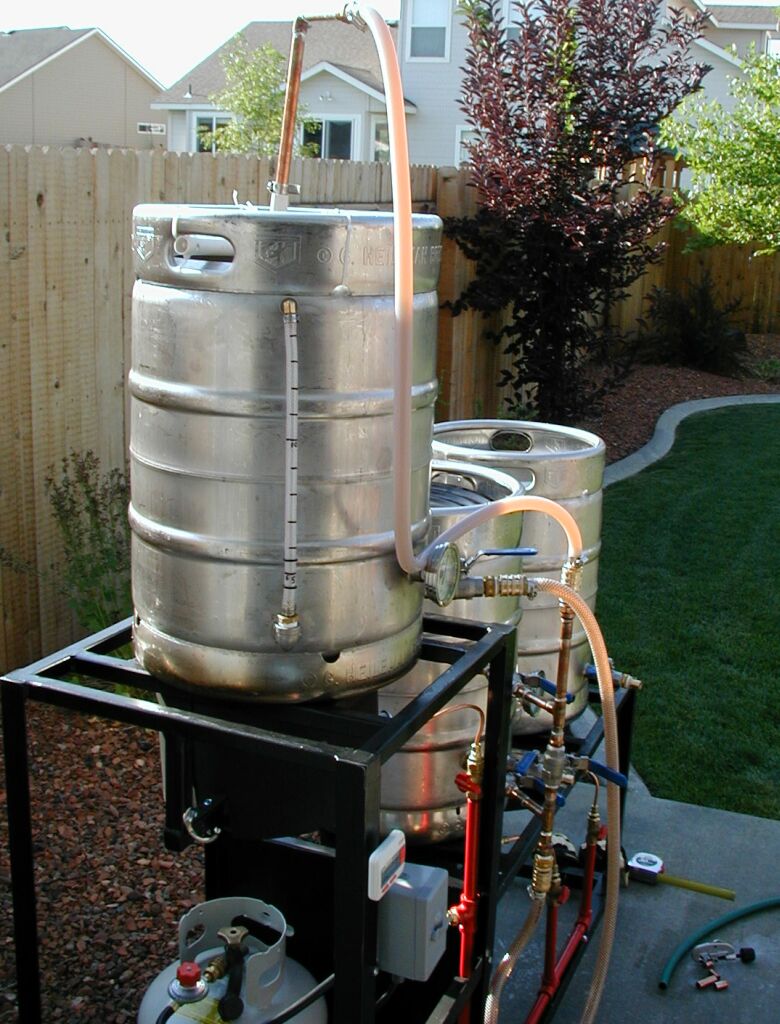
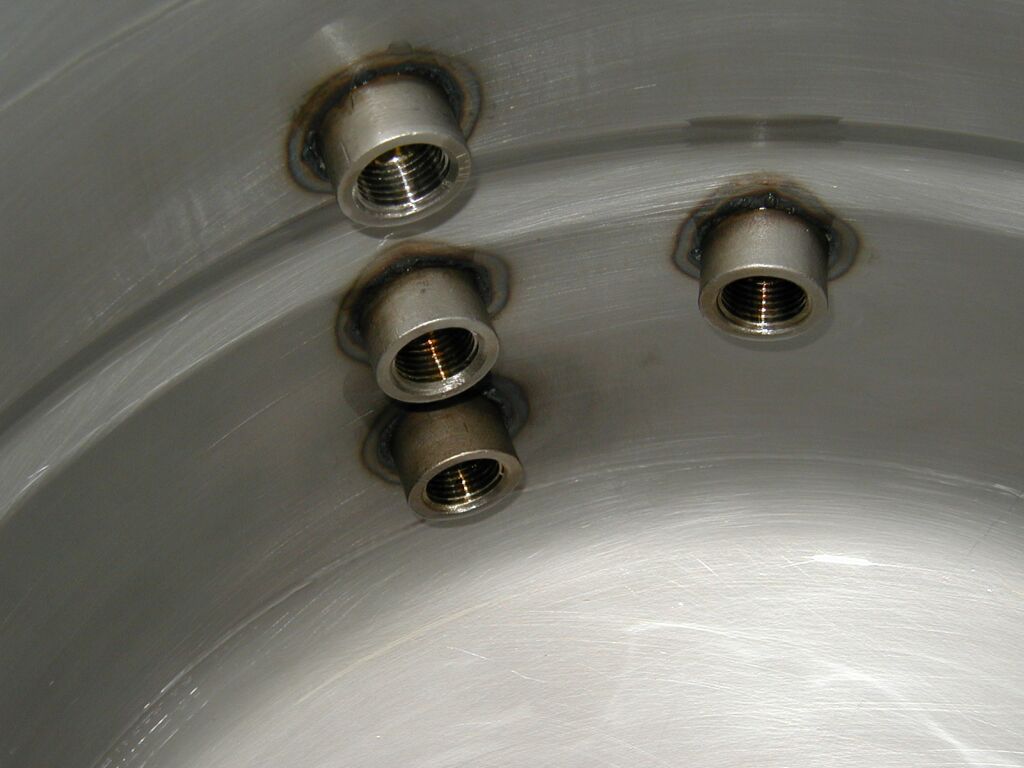
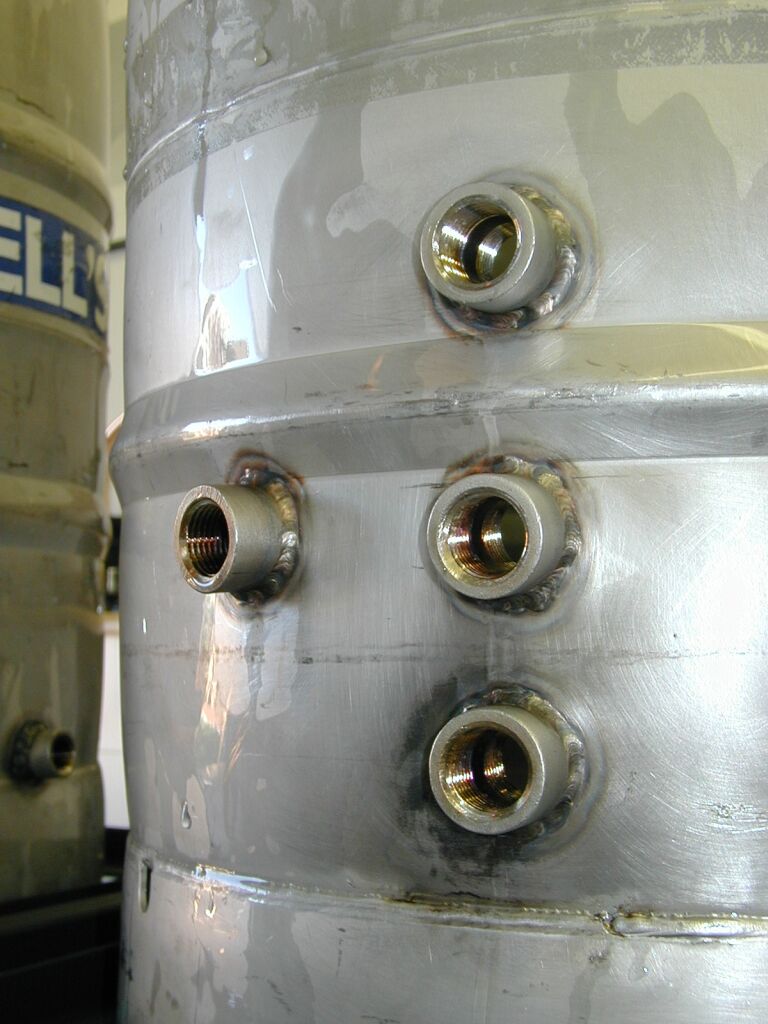
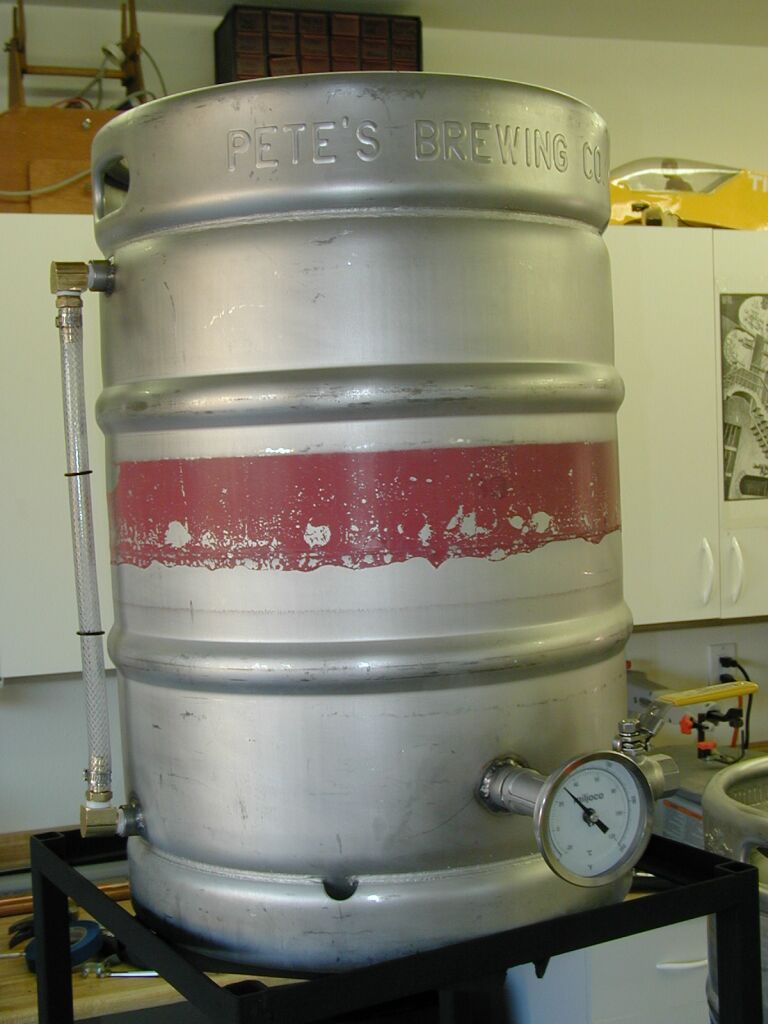
New SS 1/2" Couplers Welded in!!!
Finally got my kegs back from being welded. At $60/hr and 2 hours of labor, this was a spendy price, but I got 15 SS couplers put in, and boy, they look nice and tight. Got the insides of the kegs and the welds all cleaned up with BKF and then wrenched down hard on all the fittings while installing the ball valves and thermometers. Feels GREAT.
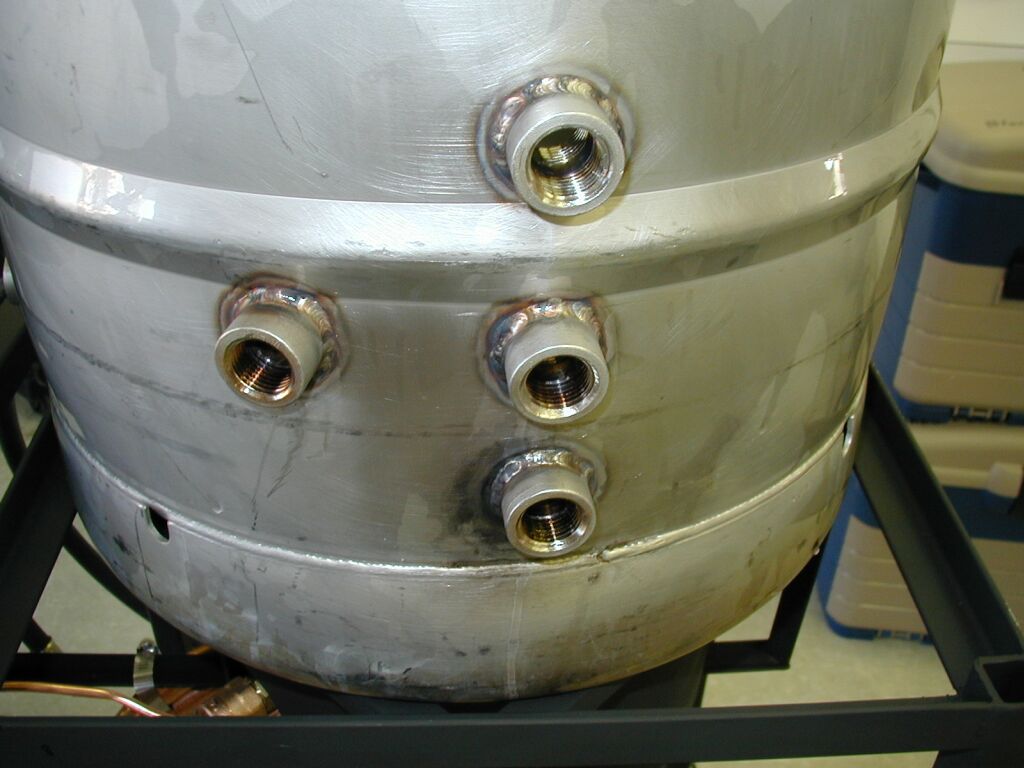
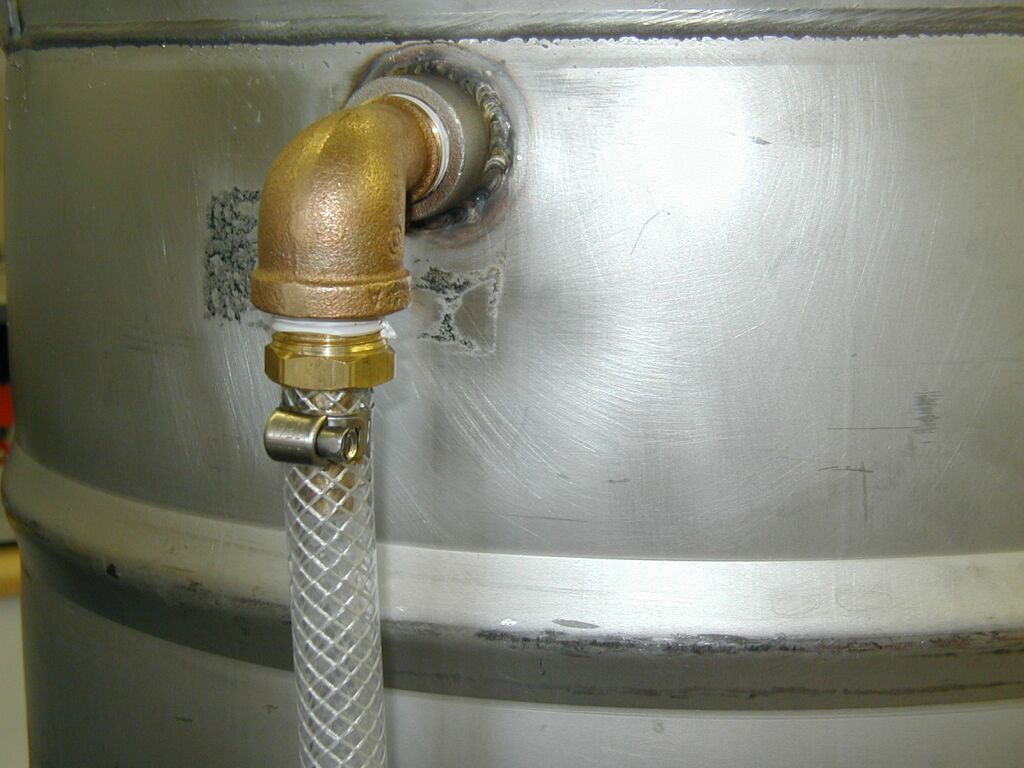
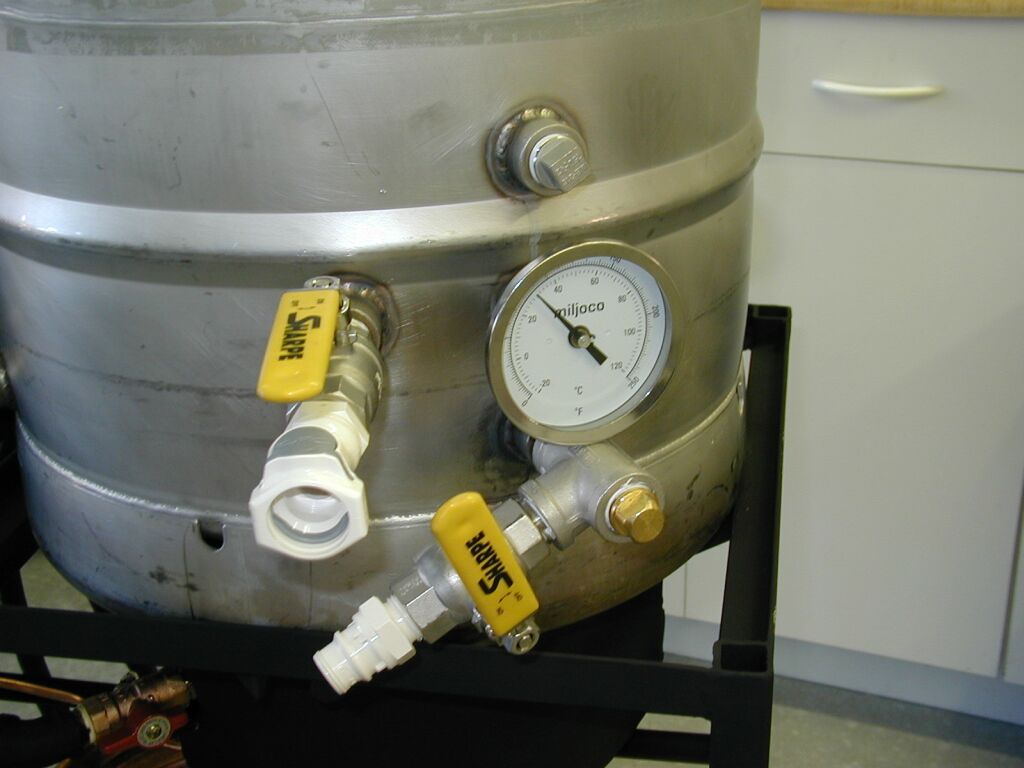
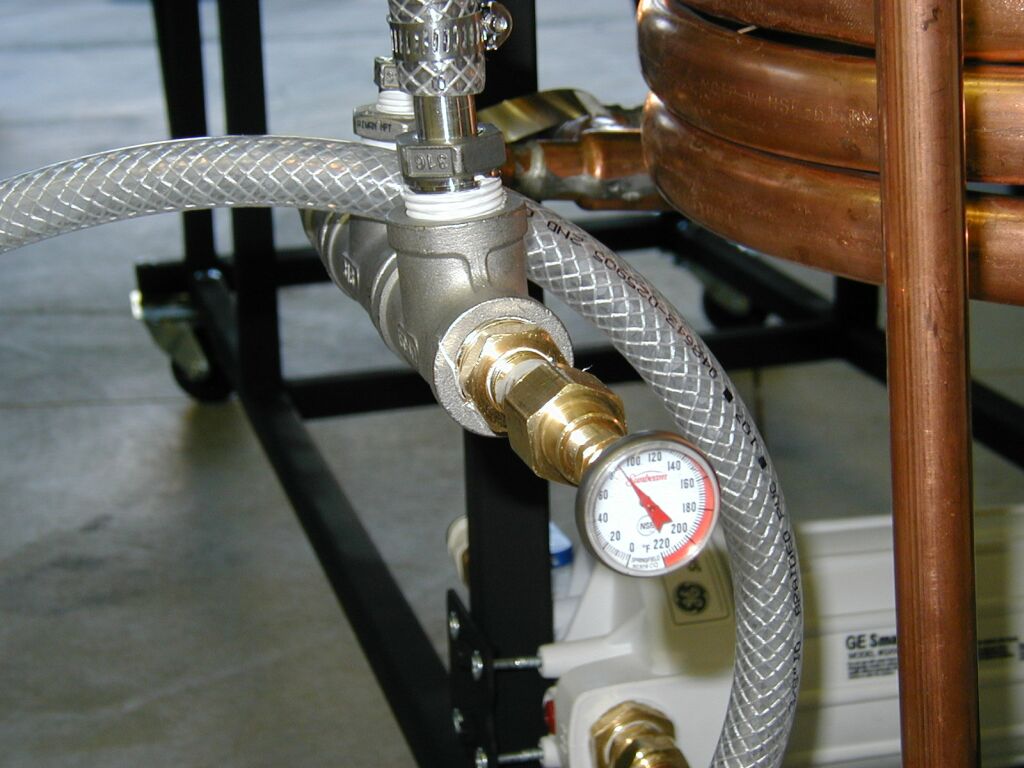
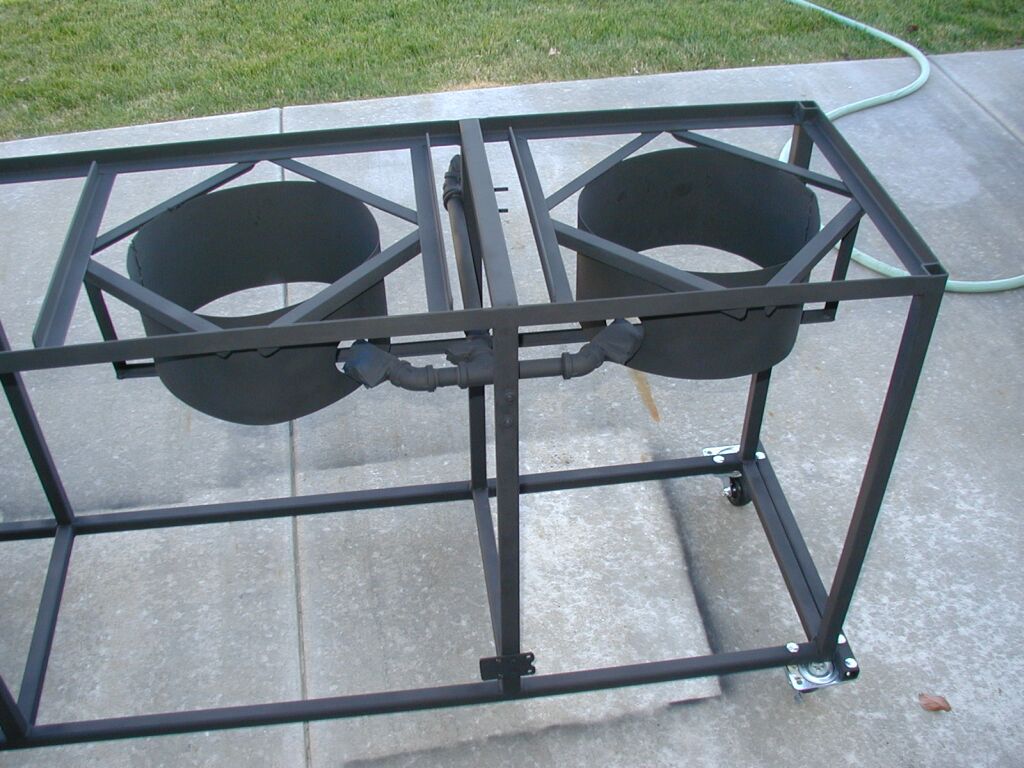
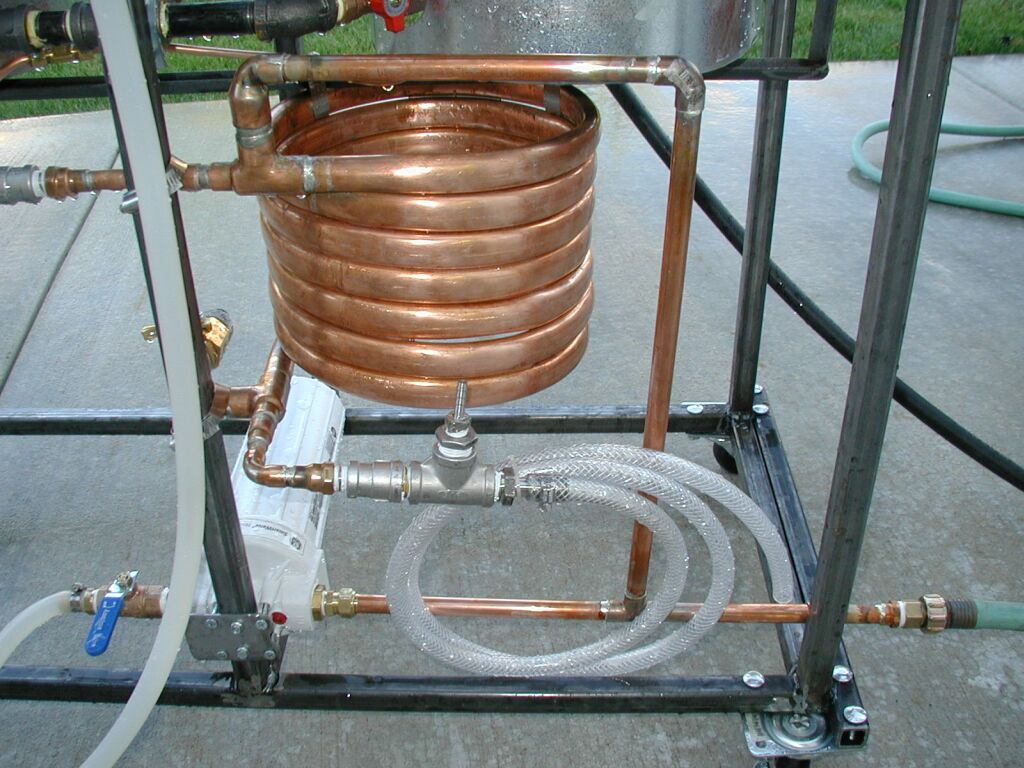
Here you can see most of the stuff connected to the new SS 1/2" couplings. I REALLY got to wrench down on these tight. Be sure to use teflon tape. I also got the areator block all finished. Used a second SS tee to divert the ouptut and then connect a small 5/32" diameter thermometer into the end. I had to drill out a 1/8" compression fitting, and will get an o-ring to compress it down with to be water tight.
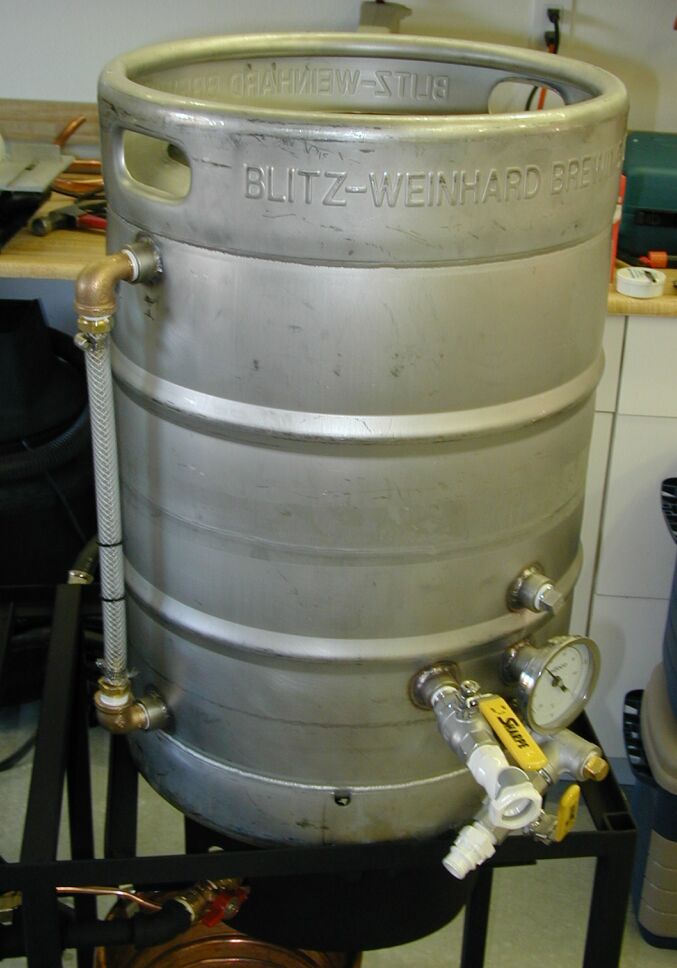
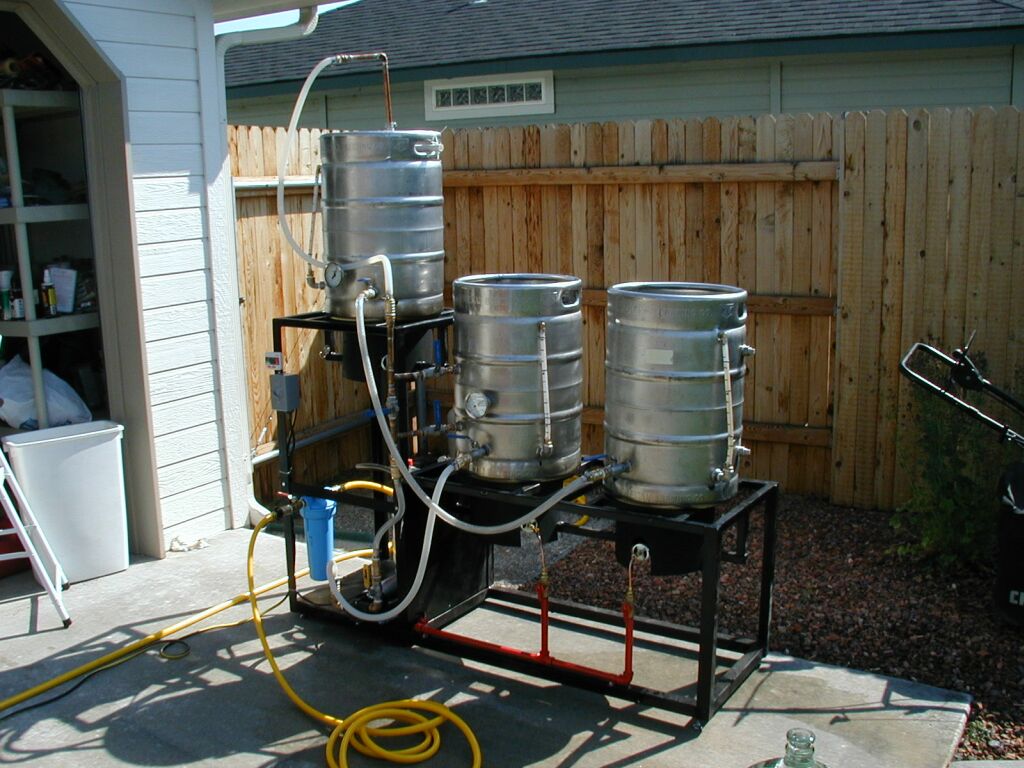
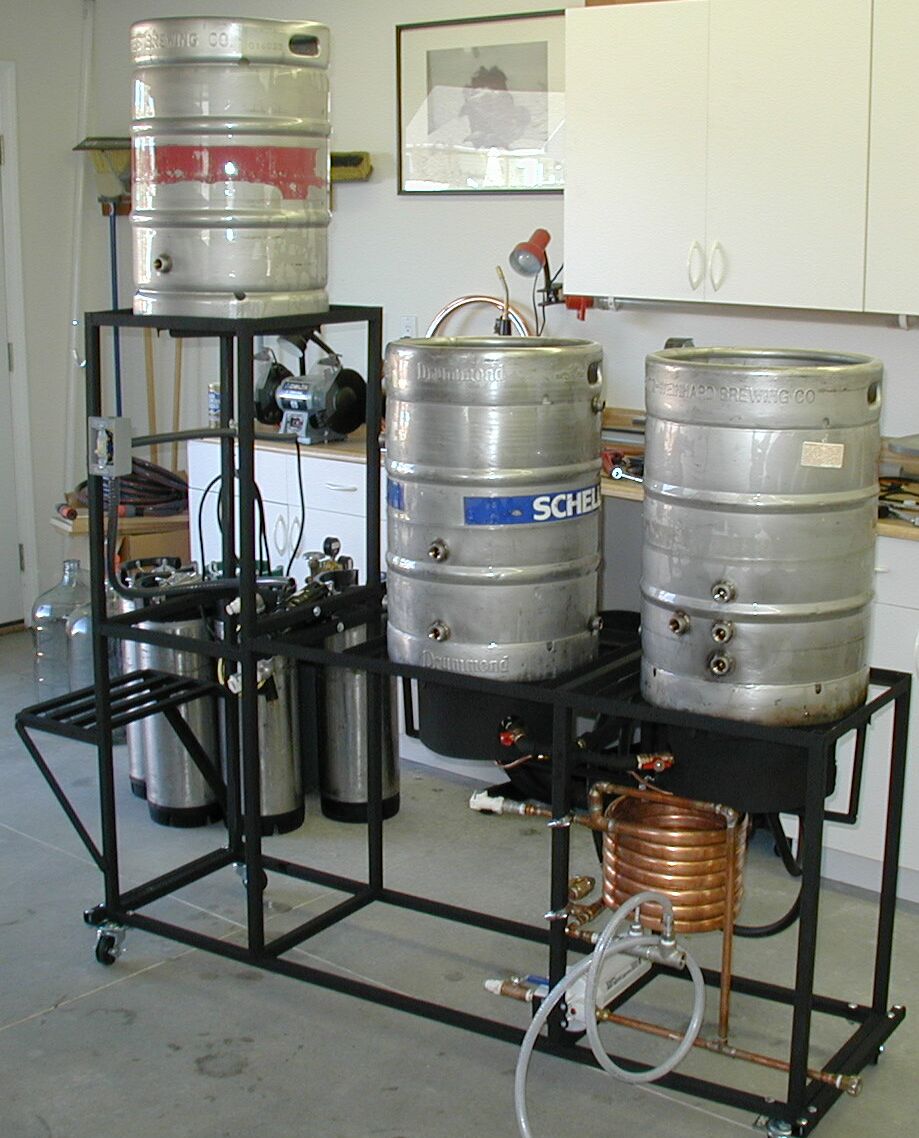
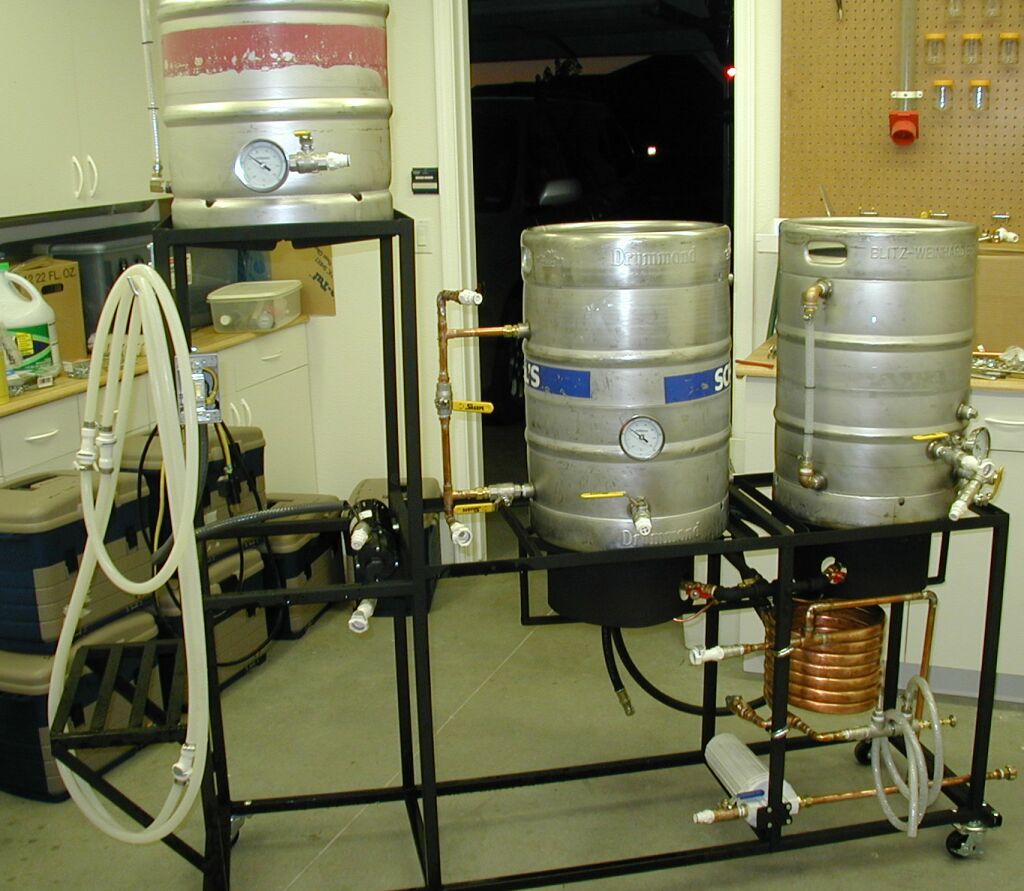
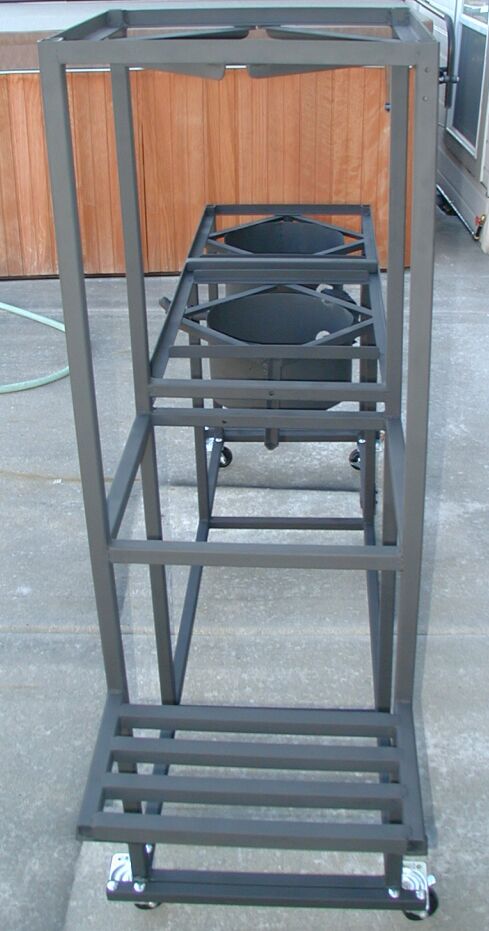
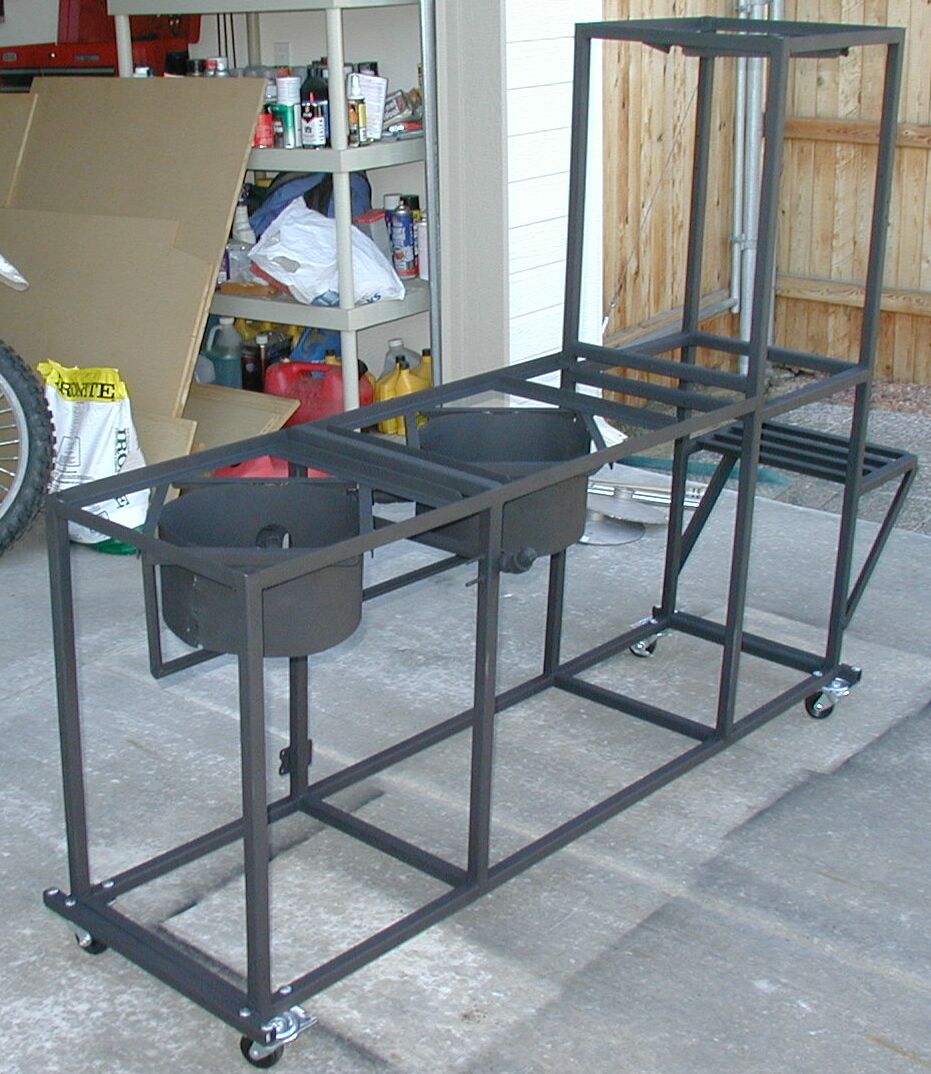
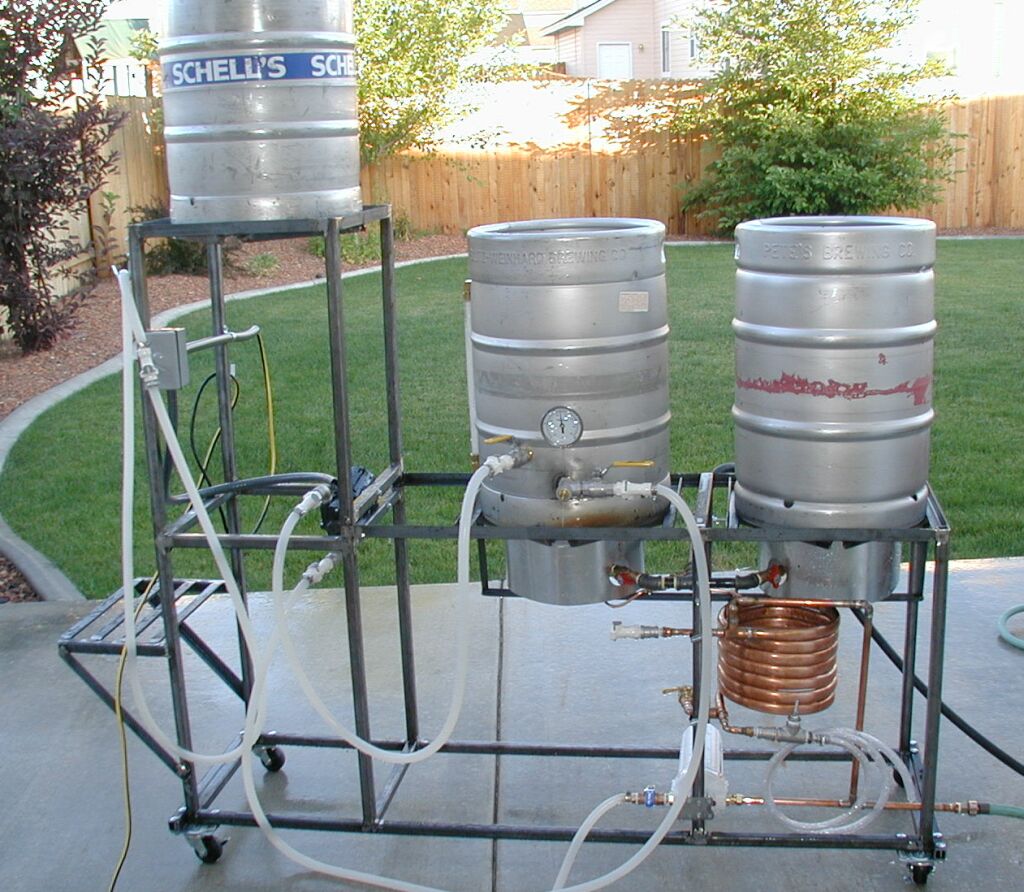
Last, here is a picture of the completed frame with all the stuff I have hooked up so far.

Sunday, July 06, 2003
Black Paint
I just finished painting the frame in high temp black enamel. It will probably scratch off in a lot of places, but it should help keep the frame from rusting.
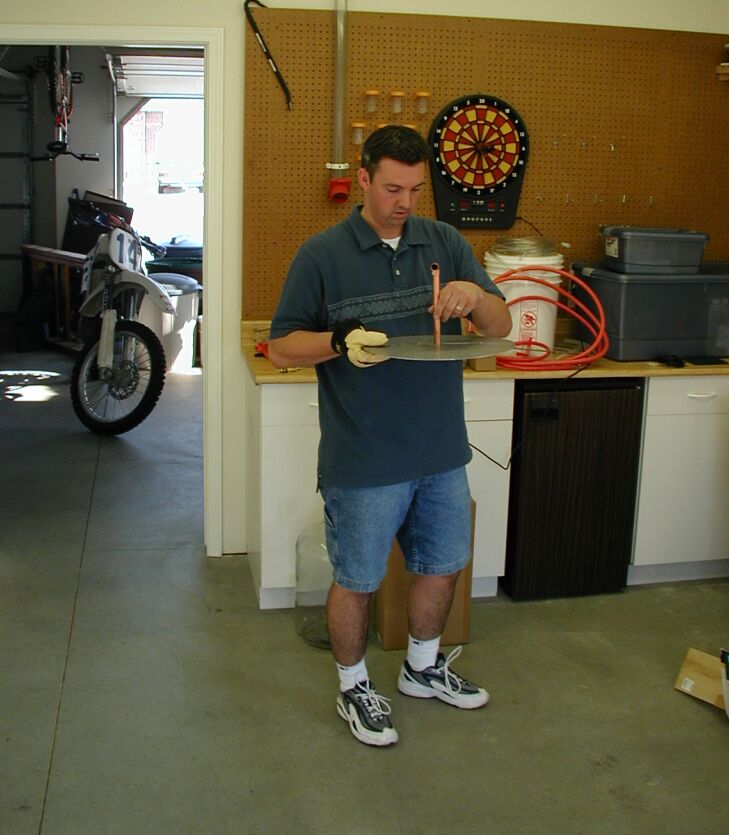
Saturday, July 05, 2003
Not even close...grin.
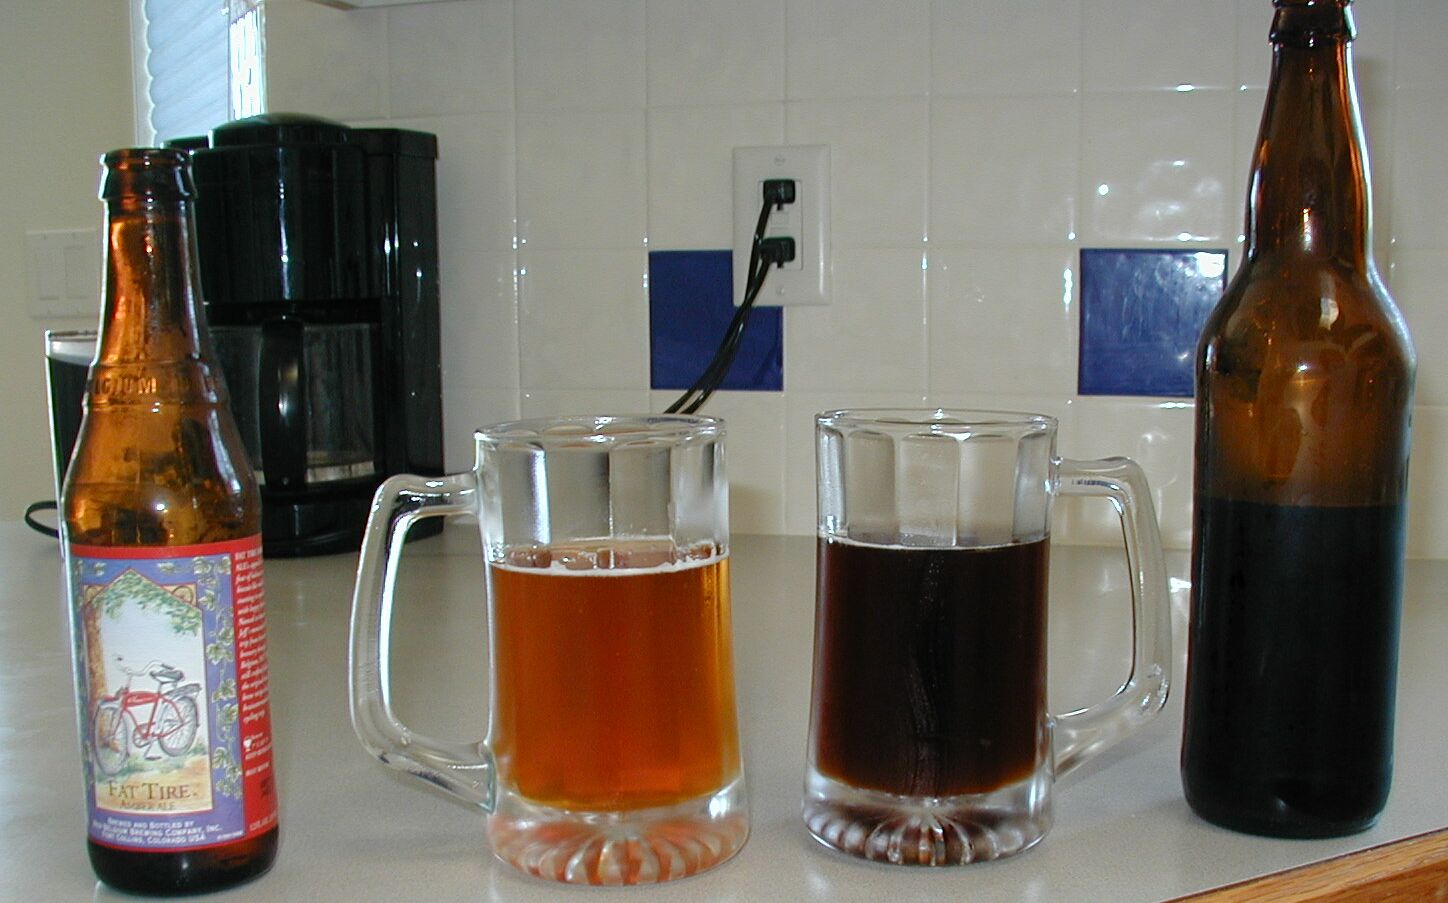
Here is the first batch of home brew that I've ever been involved in making. It was destined to be a Fat Tire clone, and Jason Hoodenpyle was the host of this brew session that first got me started. He was kind enough to introduce me to brewing and asked what kind of beer I liked. I said Fat Tire and he got a clone recipie for it and started the yeast sample. I took a day off work and went over and rode shotgun. Jason had all the ingrediants and we did a relatively simple steep of mixed malt grains in the 5 gallon pot in his kitchen. Then we did a full wort boil and added the various hops and some dry malt extract. After about 3 weeks of fermenting and a transfer to a secondary, I stopped by again (and got diner out of the deal...grin) and we bottled the brew in 24 22-oz bottles. I brought half home with me and let them sit in my dark closet for about 12 days. Last night, I put two in the fridge with some real Fat Tire in anticipation of trying out some of the new brew. Well, I opened them up and poured them side by side. Heheh, not even close. Our F@T T!RE is quite a bit darker in color. If you would like to compare the taste of the two for yourself, then click here. Despite the difference, I think I actually like the home brew better. It has a more bitter taste that may mellow with more aging (suppose to age for a couple months) and the slight sweet after taste should disapate as it finishes carbonating in the bottles.
Thanks a million, Jason. Despite it not turning out as a great clone, I consider it one of the best beers I've had. Now, we need to do a 10 gallon brew of Full Suspension beer from Squatters and we can split it. I'll make you some Weizen or maybe a pilsner in trade! Heheh...maybe this is like raising kids. When they are your own, they can't help but be great!

F!#@King weldless kits!
I've had it with these weldless kits. The thermometers leak, and so do the sight glasses (though the ball valves seem to be ok). The main problem is that the thin brass nuts on the inside don't form a water tight pipe seal with the threads and water just leaks right down the threads and then out (the o-ring can't prevent that). I even tried putting teflon tape on the treads (which helped a little), but it doesn't make me feel great having teflon tape inside the boil area (and after the first boil, the teflon began coming loose anyway). So, Monday, all three kegs are going to a metal fab shop to have 1/2" SS couplings installed. This will also give me the chance to rectify the mistake of mounting the thermometer too high in the boil kettle to do 5 gallon batches.
I also managed to get most of the heat transfer coil mounted in the HLT with compression fittings and started working on the bypass lines and ball valve assembly on the outside until I ran out of fittings, and then was called in to baby sit. So, now, I wait until I get the kegs all welded with SS fittings (grrrr).
Friday, July 04, 2003
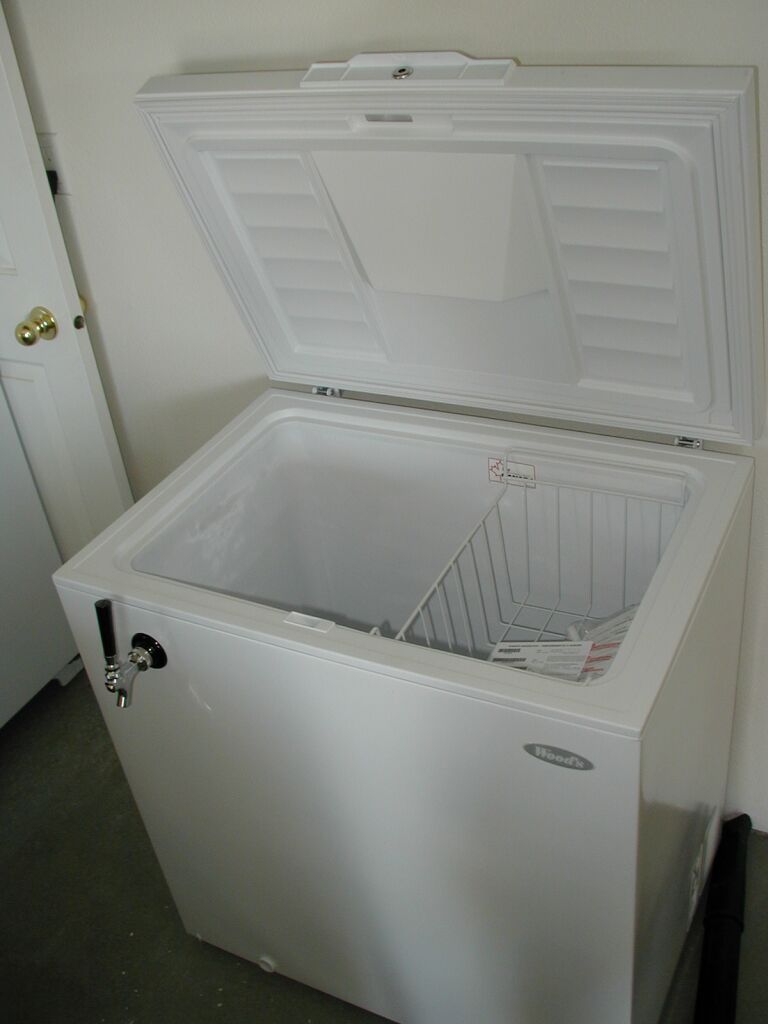
New half chest freezer
I picked up a nice new 7 cubic foot half chest freezer today at the 4th of july sale at RC Wiley's. Spent $170 on it, but at least I know it will work for a while. I immediately drilled a 7/8" hole in the front of it to install my tap and shank. Well, I barely nicked the cooling coil run in the wall, and it is just scratched, not hurt or punctured. Whew! A nice trick to find where the lines are is to let the freezer come to room temp, then plug it in with the lid open. Almost immediately, you will see cold condensation or ice form where the cooling lines run. Be very careful when drilling, but once you miss the lines, it is very easy and safe to drill.
Now, I just need a second tap and shank and to drill the C02 line into the side and seal it up tight. I also think I need to silicon the inside seams. Jason mentioned that freezers aren't meant to run above freezing, and many don't have edges of the metal sealed up and will rust.
Thursday, July 03, 2003
Lots of work complete
Here is what I got done today. Managed to get most of the frame sanded/grinded and everything mounted on it. Did a test boil on the boil kettle. It boiled 10 gallons from 50'F to 210'F in 50 minutes. That seems like a long time to me, but I shouldn't have to actually bring anything to a full boil from that temp ever.
I have also decided that I don't really like the weldless kits too much. Especially for the sight glass and the thermometer. The o-ring squishes out when you pinch it down very tight and then it just leaks along the threads. I'm about one more leak away from taking all three kegs in and having SS couplers permanantly welded in.


[ Main | What's New | Bill of Materials ]
[ Brew Frame | CFC | Kegging]
[ Brew Kettle | HLT | Mash Tun ]
[ How I Brew | My Brews | Links | Brewery Tours ]
[ Velociworks.com Home ]
[ email: jeff@themcclains.net ]

Page maintained by Jeff McClain, jeff@themcclains.net. Copyright(c) VelociWorks 2003-2005 Last modified Friday, 20-Apr-2018 15:02:35 CDT
